Wednesday, March 12, 2014

Bridesmaid Dress To Baby Quilt Round 2

Once I had finished the quilt I made for my sister in-law I was inspired to make another for my sister. It just so happened that she was also pregnant and I had been in her wedding. In my mind I was a professional quilter so this project would take no time at all. In reality I am a dreamer and again it was a lot of work but I did get it finished faster than the first one.

Unfortunately my sister did not find out the sex of her baby so we had to choose a neutral theme. The good news is that the dress I wore for her wedding was a tan and Tiffany blue.
That is me in the dress! (bummer I had no photos of my sister and I)
Since my sister did not know the sex of the baby and she had a neutral nursery from here previous babies, I had no direction to go. So I decided to purchase a sheet from Pottery Barn but of course it was not the right color so I ended up with 3 different sheets from Pottery Barn.  Once I had the sheet I hit the fabric store and purchased 4 coordinating fabrics.

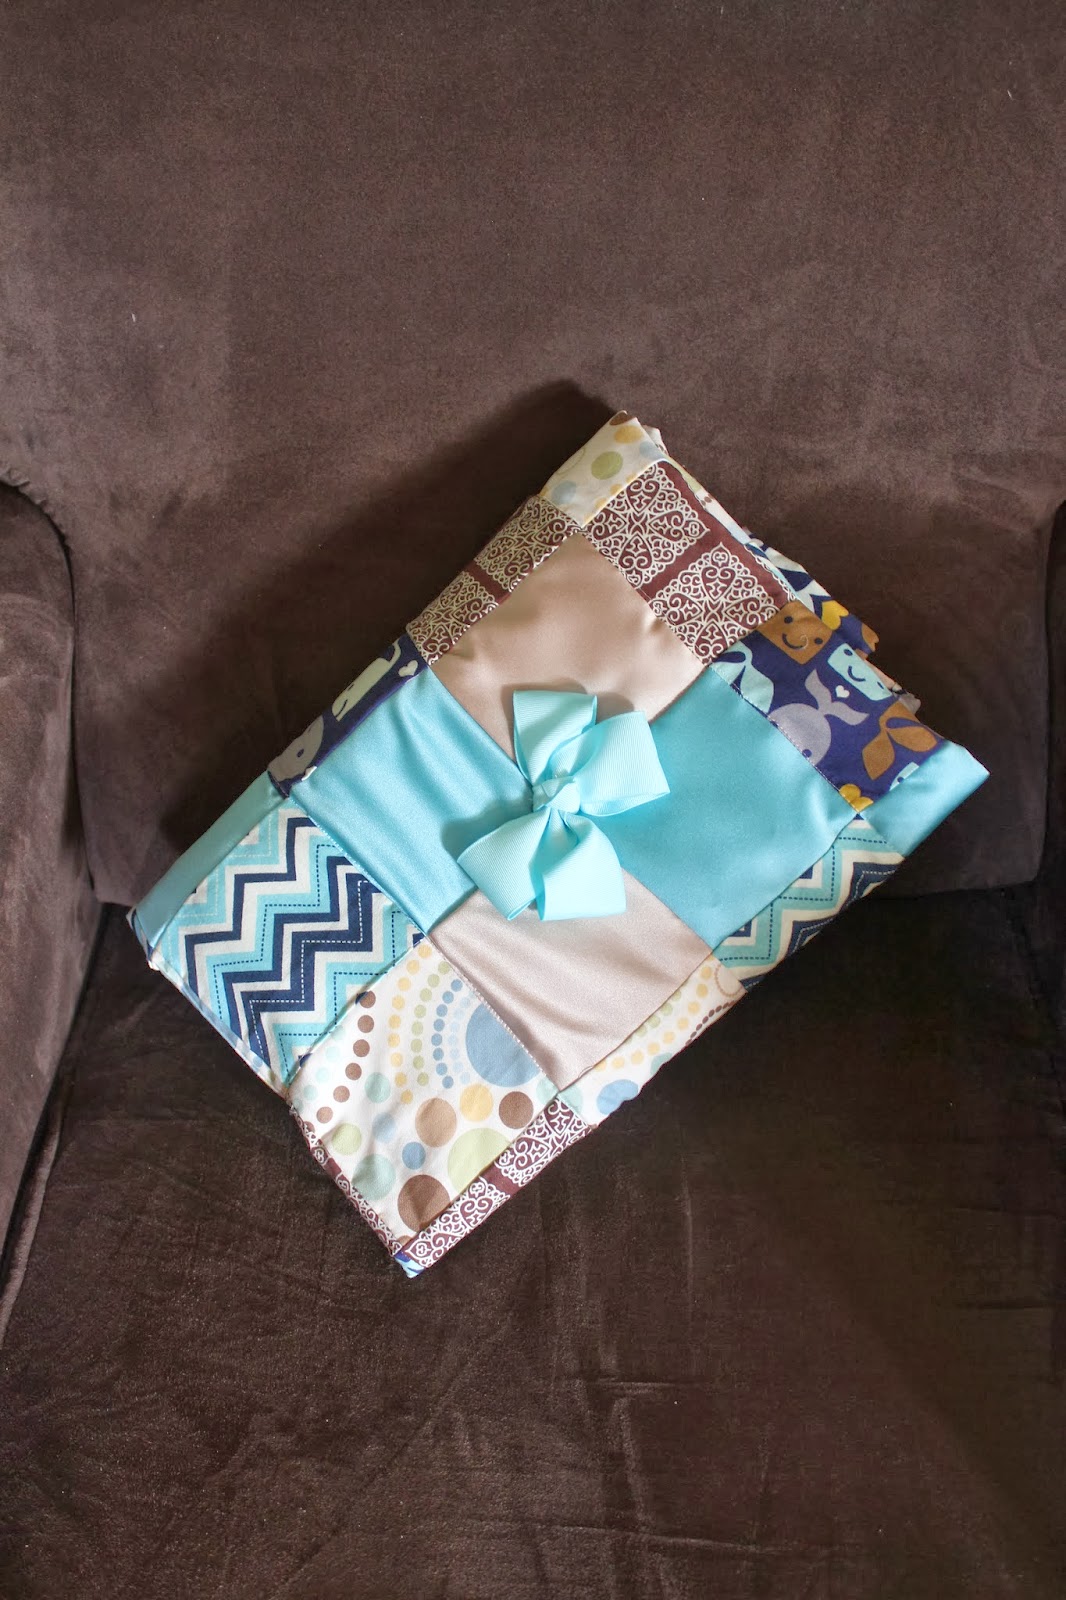
Then the hard work started I cut 20 4x4 squares out of each fabric and the dress (since the dress had two colors I used both in the quilt). Once I finished cutting them out I placed the out in the pattern I wanted and pinned them all together. This time instead of sewing the squares in groups of 4 I actually sewed them in rows. I think this went much faster. Once I had a row complete I sewed the rows together until the quilt was finished.

The next step is the put the quilt together, adding the sheet and the batting. Once that was completed I did some machine quilting, this time I quilted down every other row. I started on one side and worked to the other, I wish I had started in the center and worked out. Finally I added a bow to finish the piece and give it a girly feel because I knew the sex.


Unfortunately I was in a hurry to finish the project and I did not have time to take pictures of each step. I am hoping the next time I make a quilt I will not be in a rush and will be able to photograph the process. 
Hope you like it.

When I presented my sister withe the quilt. I gave her this letter with a copy of the photo of myself in the dress from her wedding.
  
Jackie,

It was not that many years ago that you gave me the privilege to stand next to you as you married Chris.  It was such a beautiful day, now as we meet Meredith, I wanted her to have a piece of that day to treasure.  So, if you look closely at this photo and this gift you will see that they have something in common.

Congratulations!


Love Michele


Newest Cake Creation

I recently baked a cake for one of my friends that was moving from Pennsylvania to Alabama. I found my inspiration for the this cake on Pinterest and ran with it. Let me know what you think!


PA Cake

AL Cake

Moving Van

Party Set- Up


I would love hearing what you think of the cakes. I used boxed cake mixes and homemade butter-cream icing.

Saturday, February 15, 2014

Valentine Chex Mix

I made this Valentine's day inspired Chex-mix for a recent play date. It was super easy to make and fun to eat!


Ingredients:
  • 6 cups Chex cereal ( I used cinnamon )
  • 12.6 oz. M&M’s, I use regular, but you can substitute with whatever flavor you wish
  • 3 cups pretzels
  • 24 oz. vanilla melting chocolate 
  • 1/2 cup Valentine Sweethearts
  • 3 tbs sprinkles

  • In a microwave safe bowl, melt chocolate in the microwave for 2-4 minutes at 30 second intervals, until melted. Set aside. ( I actually did this after I mixed the cereal)
  • In a Extra large bowl mix the cereal, pretzels and M&M’s.
  • Pour the melted chocolate over the cereal mixture and mix with a spatula until well coated.
  • Pour out onto wax paper. I spread some wax paper on my dining room table.
  • Sprinkle the Valentine Sweethearts and sprinkles over the mix.
  • Allow to dry and then break apart. Store in air tight containers.

  • Original recipe found on Pinterest @ http://familyloveandotherstuff.com/

    Ready to Serve! Yummy


    Packaged and ready for delivery!


    Monday, January 27, 2014

    Trash to Treasure

    One of my all time favorite pass times is going to yard sales. In addition to hitting local yard sales I have also been known to find some great treasures in the trash. These are some of my great finds.


    I found this beauty at a yard sale for $3.00. I did some sanding and repainted it.

    I sold it at a local yard sale for $65.00. What a beautiful piece, I wish I took a photo before I refinished it.


    Coffee Table Trash Find

    I found this coffee table and 2 end tables in someones trash last summer. They were in ruff shape. The end tables had no glass and the varnish was peeling off. My husband sanded all three pieces down and we repainted them in a bright white and purchased new glass for the end tables. I sold them separately at a yard sale last summer. Again I wish I had taken before and after photos!!


    Easy Crock-pot Chicken and Stove Top

    This is a super easy and delicious Crock-pot meal. 


    Ingredients
     2-4 boneless chicken breasts ( I use frozen)
    package of Stove Top stuffing mix
    1/2 cup sour cream
     1 can of cream of chicken soup


    Directions:
    - Put the chicken on the bottom of your crock-pot
    -Cover with Stove Top
    -Mix sour cream, cream of chicken soup, and 1/4 cup of water in a small bowl. Then put it over the Stove Top.
    -Cook on low for 4 hours


    This is quick and easy recipe is sure to be a family favorite.